I started out with this pattern.
This is a free stained glass pattern so if you would like it just right click and save as.
I started working from the top down. I would cut a piece and then grind to make sure I had a good fit before going on to the next piece.
I was having a real problem with the diagonal pieces until a friend suggested that I trace the pattern onto a piece of cardboard, then cut the pieces out and lay them on the glass to cut. That little tip made the diagonal pieces a snap. Thanks Darlene!
When I got to the bottom there was a bit more fine tuning to have it all come together with as few gaps as possible but I think I managed it pretty good.
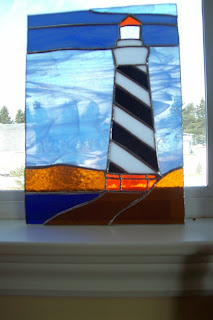
Here is the finished piece. The top image is the front side of the stained glass project and the bottom image is the back side.
The piece measures 9 1/2" x 13 1/2" You can see that it is a much more uniform piece and the soldering is much better than the first piece thanks to a couple of youtube videos. I think the trick to soldering a nice rounded line is to hold the soldering iron a wee bit off the actual piece and have the solder roll down and off as you move the soldering iron along the line you are soldering.
Next up will be a stained glass hot air balloon project. Then I would like to do a sailboat and a ship in a bottle.
What I really want to get good enough to do is inset stained glass into mirrors such as a border of shells around a bathroom mirror or a geometric insert into a mirror. The possibilities are unlimited. come back soon to see how the stained glass hot air balloon turns out.


.png)
